Now that you finally got your Mellow Drive you are going to want to review some helpful advice. Here are some basic steps to show you how to get started rolling safely and better understanding your new best friend right from the start. Mellow School is in session!
Mounting the Drive

The Mellow Drive mounts just like a normal skateboard truck on the tail of the board. There are six holes in the metal “baseplate” (the part of the Drive with holes for screws that attaches to the deck) but you will only use four. The best option is to simply use the holes already in your deck.
If you’ve purchased a Mellow Board complete or 4x4 setup from us you might have chosen a deck like the BuddyBuddy FREERIDE GT with a puzzling 8 holes pre-drilled in the front and another 8 in the back, and no holes at all in the “grip tape”. This is so you can choose the position of the trucks, setting the “wheelbase length” (distance between the trucks) based on your riding style.
Just put the Drive and front trucks on the holes you’ve picked for each and use them as a guide to poke through the grip tape with a bolt. Feel free to experiment by mounting and testing different positions out, even if that means poking more holes through the grip than you’ll eventually use - your new friend was meant to be ridden, not framed and put on the wall. Make a shorter wheelbase (putting the front truck and Mellow closer together) for tighter turns or a longer one (further apart) for higher stability at high speeds.
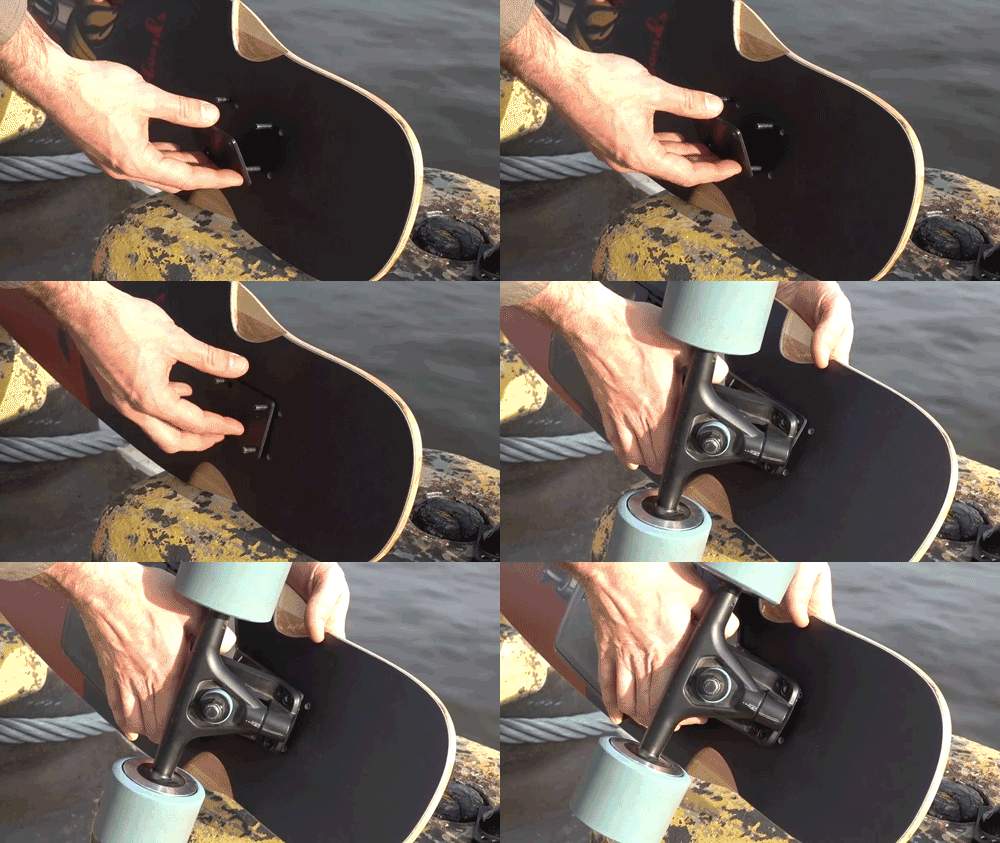
For the 4 holes of front truck and the 4 holes on the Mellow Drive, insert the bolt through the grip tape, the deck and truck baseplates, in that order. We recommend using a “riser” which is a plastic rectangle that you place between the deck and a baseplate to avoid the wheel touching the board when turning. You might need to use an angled riser depending on your board’s curvature. Use a skate tool, pliers or a wrench to hold the nuts in place while you tighten the bolt with a screwdriver with enough force to hold the riser tightly. For the inner holes of the Mellow, you don’t need a skate tool, simply hold the nut in the hex-shaped wells with a finger tip while you screw the bolt in from the other side. Tighten your inside bolts first so your Drive sits more more flush with the deck.
Pairing the Drive and Remote
Click the button on your remote once (the warning triangle will pulsate green indicating that it is ready to pair) and switch your Drive on by pressing the large round button once. Let go, and press the Drive button again, holding for 5 seconds to put it in pairing mode. When the Drive LED ring turns off momentarily and begins to spin, you can release your finger. Click the remote button once; if it vibrates and displays mode, your Drive and remote are now paired!
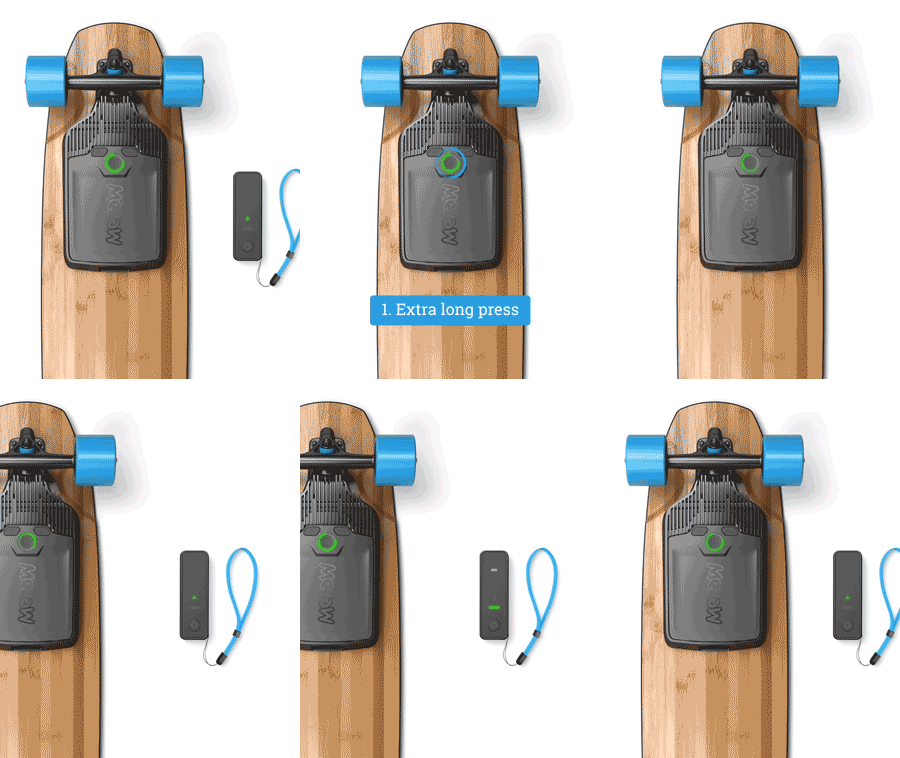
If you are with another Mellow board that is pairing at the same time, give each other about 10 meters space to avoid conflicts.
Push Start
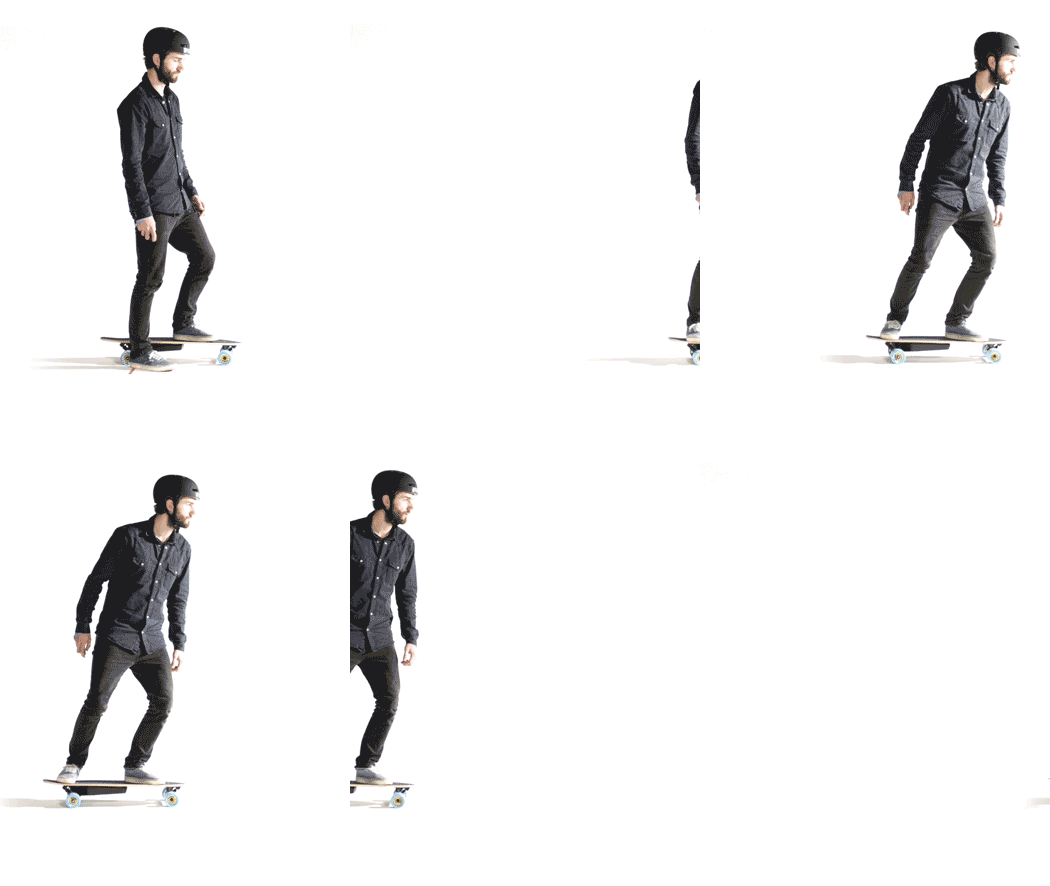
For safety and energy saving reasons, a Mellow needs to be in motion before it will start, requiring you to kick off then stand firmly on the board before hitting the gas. So give it 2-3 good pushes on the ground on the side you are facing with your back foot, keeping your front foot on the screws of the front truck and parallel with the board. Once you have gained some speed, place your back foot on the screws of the back truck perpendicular to the board. Now move your front foot to a perpendicular position while rolling. Bend your knees, lean toward the nose of the deck slightly and accelerate gradually by sliding the remote forward.
Changing Modes
Changing modes is easy. You can do it before you start riding or while you are rolling with the remote in a neutral position. Take your time with the modes and take it easy when advancing to higher acceleration. Spend some time in Rookie mode on your first tries before you work you way up to Eco. When you want to go full speed get low and go Pro!
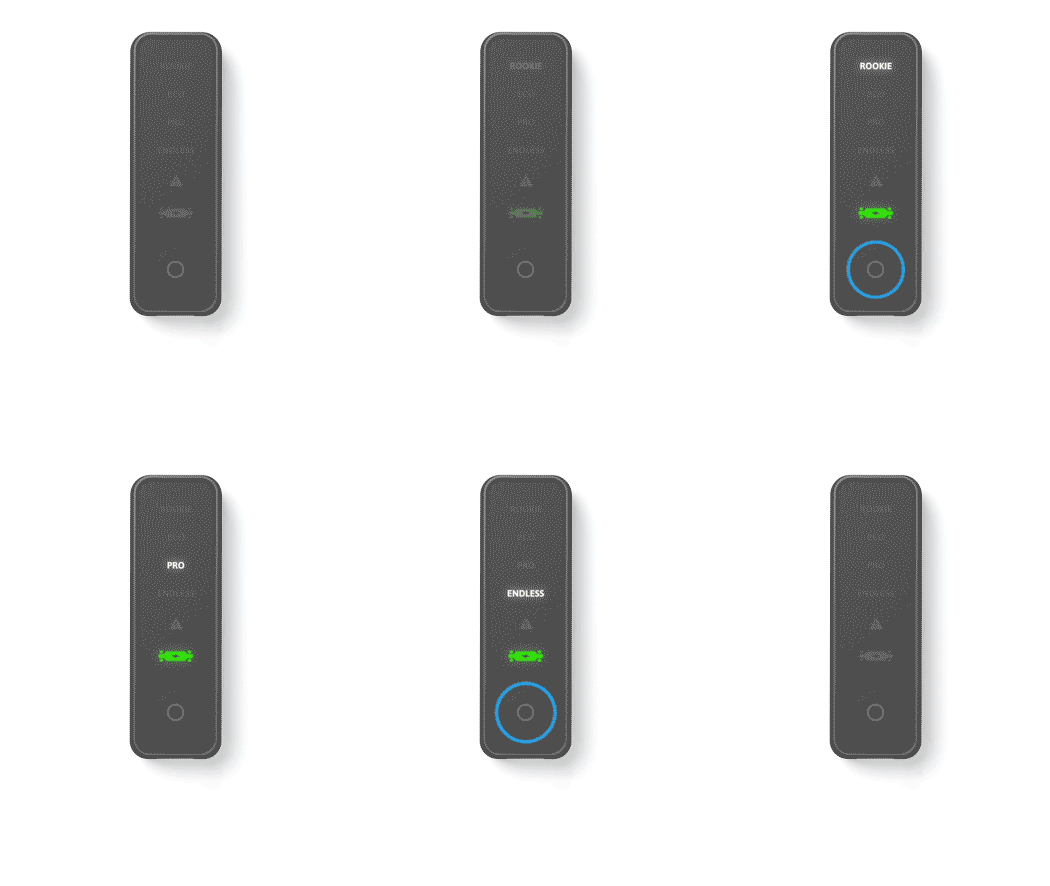 All new boards will have a speed limit of 25 km/h for the first 30 km.
Braking
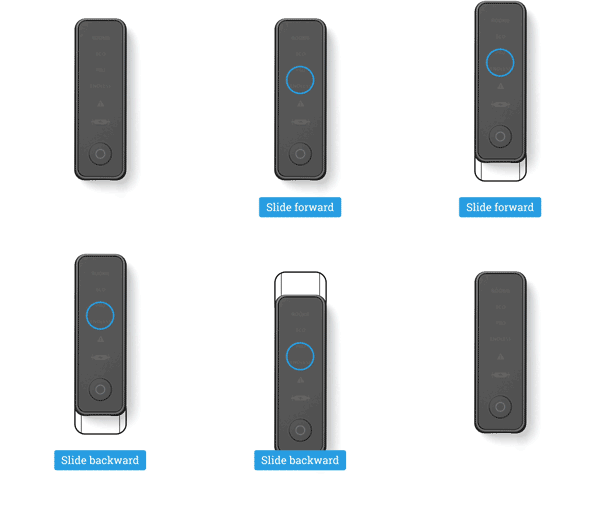
Braking is simple. Just remember to slide the remote « forward » to go fast and slide « backward » for braking if you are ever in doubt. Like acceleration, ease into the brake to create the smoothest experience possible. Always shift your body weight back and your feet forward to anticipate the deceleration to assure you stay on the board. Something important to know about when you are going very fast is that the brake stops working at 45km/h. The speed governor will limit you at 40km/h but a natural hill can carry your free wheeling speed higher. At this point the energy created while breaking is too much for the drive. The drive will idol with no braking available to protect itself. At this point foot break or slide to slow down. Give yourself time before going fast and try to learn classic stopping maneuvers to assure you always have a plan B.

Remote Buzz Warnings:
When you are reaching high speeds the remote will give you buzz warnings.
At 30km - 1 buzz
At 35km - two buzzes
At 40km - three buzzes
Safety Tips:
Safety is key when riding your electric skateboard.
-Always wear a helmet and protective gear.
-Bend your knees and lean forward, especially when you are picking up speed.
-Anticipate bumps by keeping your weight back and popping your nose a little. If your board has no kick-tail then do a mini hop barely leaving the board when you roll over bumps and rough surfaces.
-Wear bright clothes or get a light on your board or bag when skating at night.
-Going fast is fun but we recommend staying Mellow to keep chances of crashing low. Just enjoy the ride!

There you go. We hope that was helpful. Stay tuned for Mellow School sessions that will help you better understand and enjoy your Mellow Drive more by subscribing to the Mellow Times!


